Sinch Elastic SIP Trunking can easily integrate with Ribbon SBC. Follow this guide to learn how!
Before you begin setting up your Sinch Elastic SIP trunk make sure you have done the following:
- Sign up for a free account at https://www.sinch.com/ and request access for Elastic SIP Trunking. Need help? Click here for instructions.
- If you have not already done so, configure and create your Elastic SIP trunk. Instructions on how to do this can be found here.
- Ensure you note the fully qualified domain name (FQDN) that was created on your SIP Trunk. You will need this while setting up your IP-PBX or SIP Application.
Log into your Ribbon SBC UI with administrator privileges and navigate to IP Signaling Peer Groups.
Create a new peer group for your trunk.
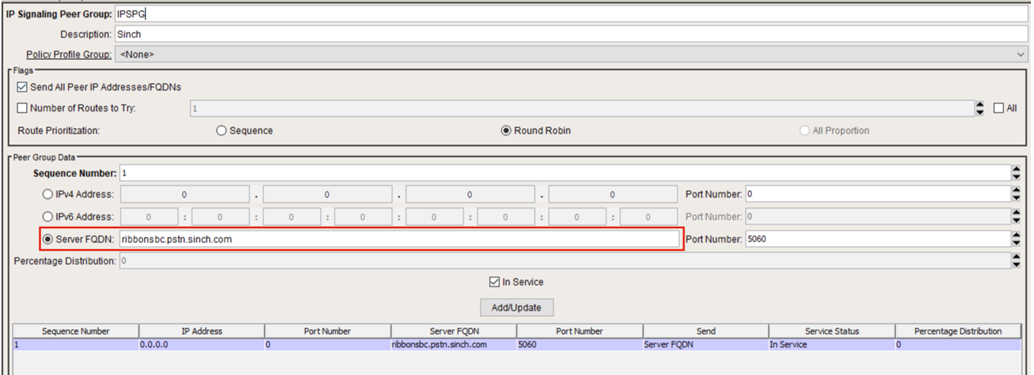
Leave the IP address blank and add the Elastic SIP Trunk's fully qualified domain name (FQDN) you created when building your SIP Trunk to the Server FQDN field. When finished, click the Add/Update button to create the entry.
Next, create a new feature control profile for the trunk. Under feature (set 2), ensure that the Always Use Billing Number For Calling Party Number and Always Use Redirecting Number For Calling Number options are both selected.

Save this profile when finished.
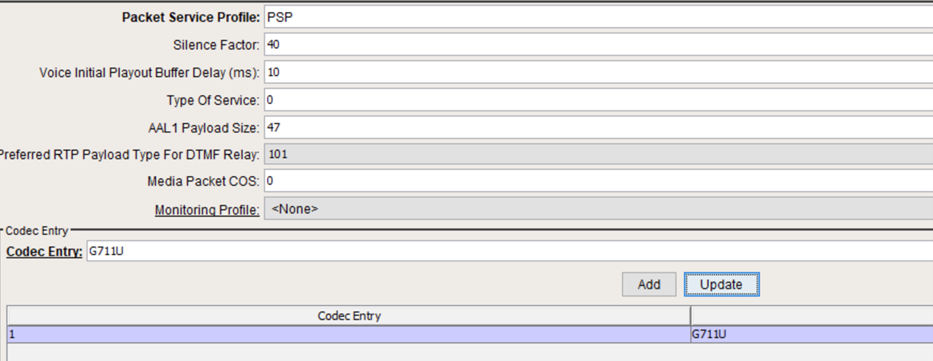
If you do not already have one, open the codec entry page and set up a new codec profile for G.711uLaw.

Set the Packet Size to 20 ms and ensure you enable ULaw and RFC 2833.
Finally, add the new codec entry to the Trunk's packet service profile.
Your Elastic SIP trunk should be operational and ready for traffic. Assign a number to your trunk and give it a try!

