This document will guide you through configuring Sinch as a Multi-Factor authentication provider in Auth0.
This is not a replacement for built-in Auth0's Multi-Factor authentication but rather an alternative.
- Auth0 account
- Sinch account with enough credits
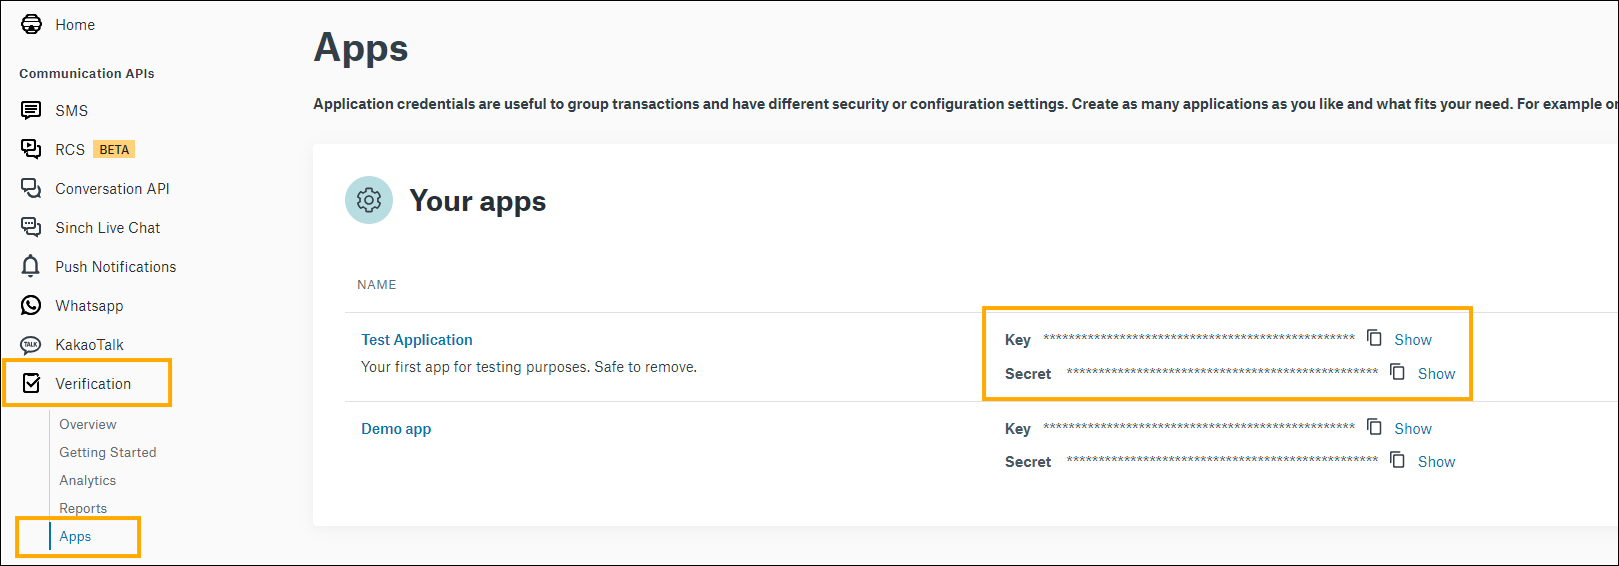
Navigate to
Appsin theVerificationsection of the Sinch Build Dashboard.Locate and save the
KeyandSecretof the application you intend to use with Auth0. You will need them in the next steps.
Log into your Auth0 dashboard.
In the Marketplace find
Sinch Verification.
In the next window click
Add integration.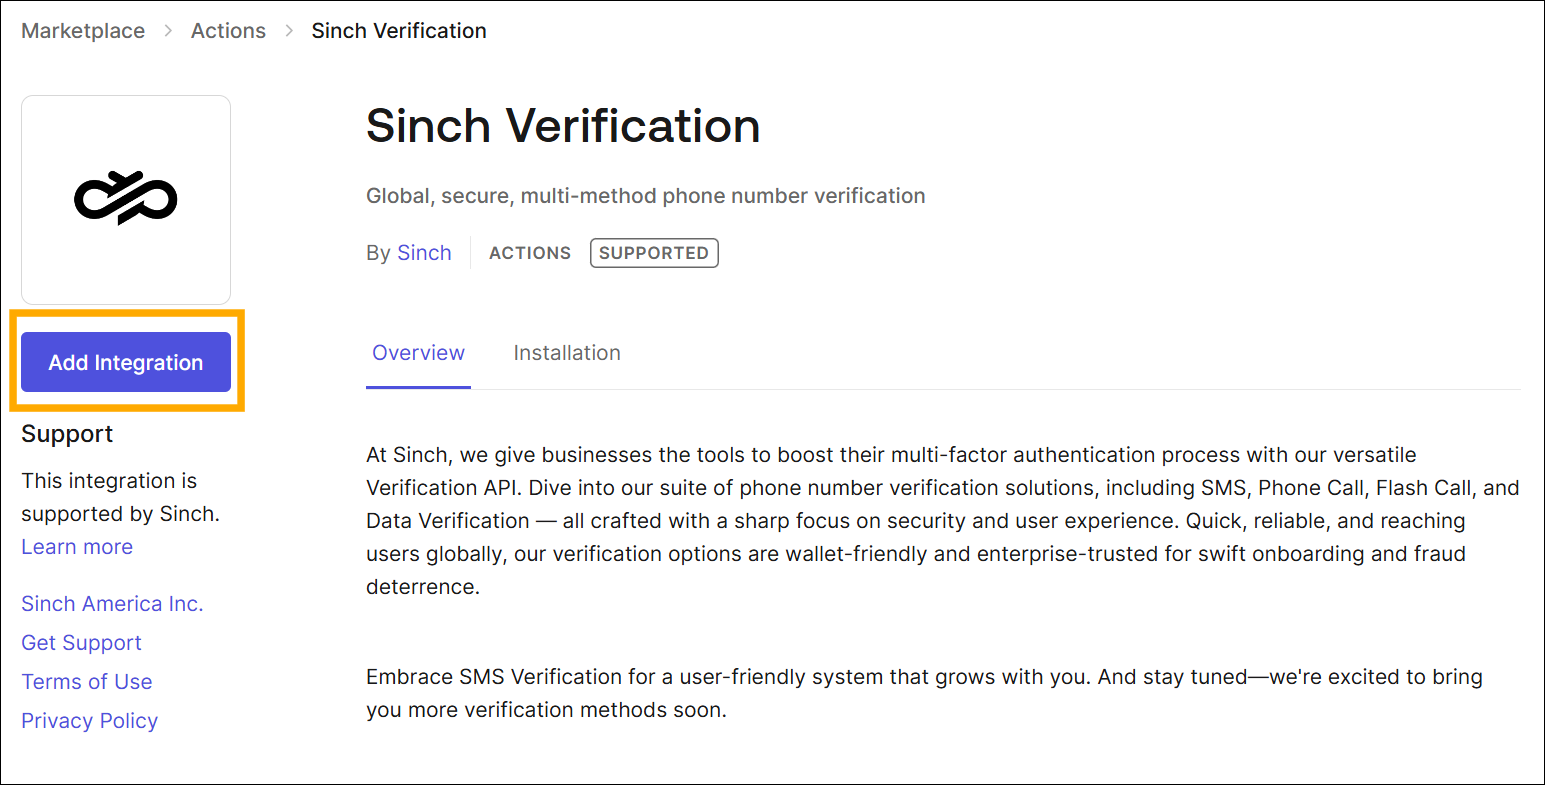
Grant the action access it requires. You'll be prompted for
App KeyandApp Secret. Enter the values that were obtained from the Sinch dashboard in the previous section.Click
Create.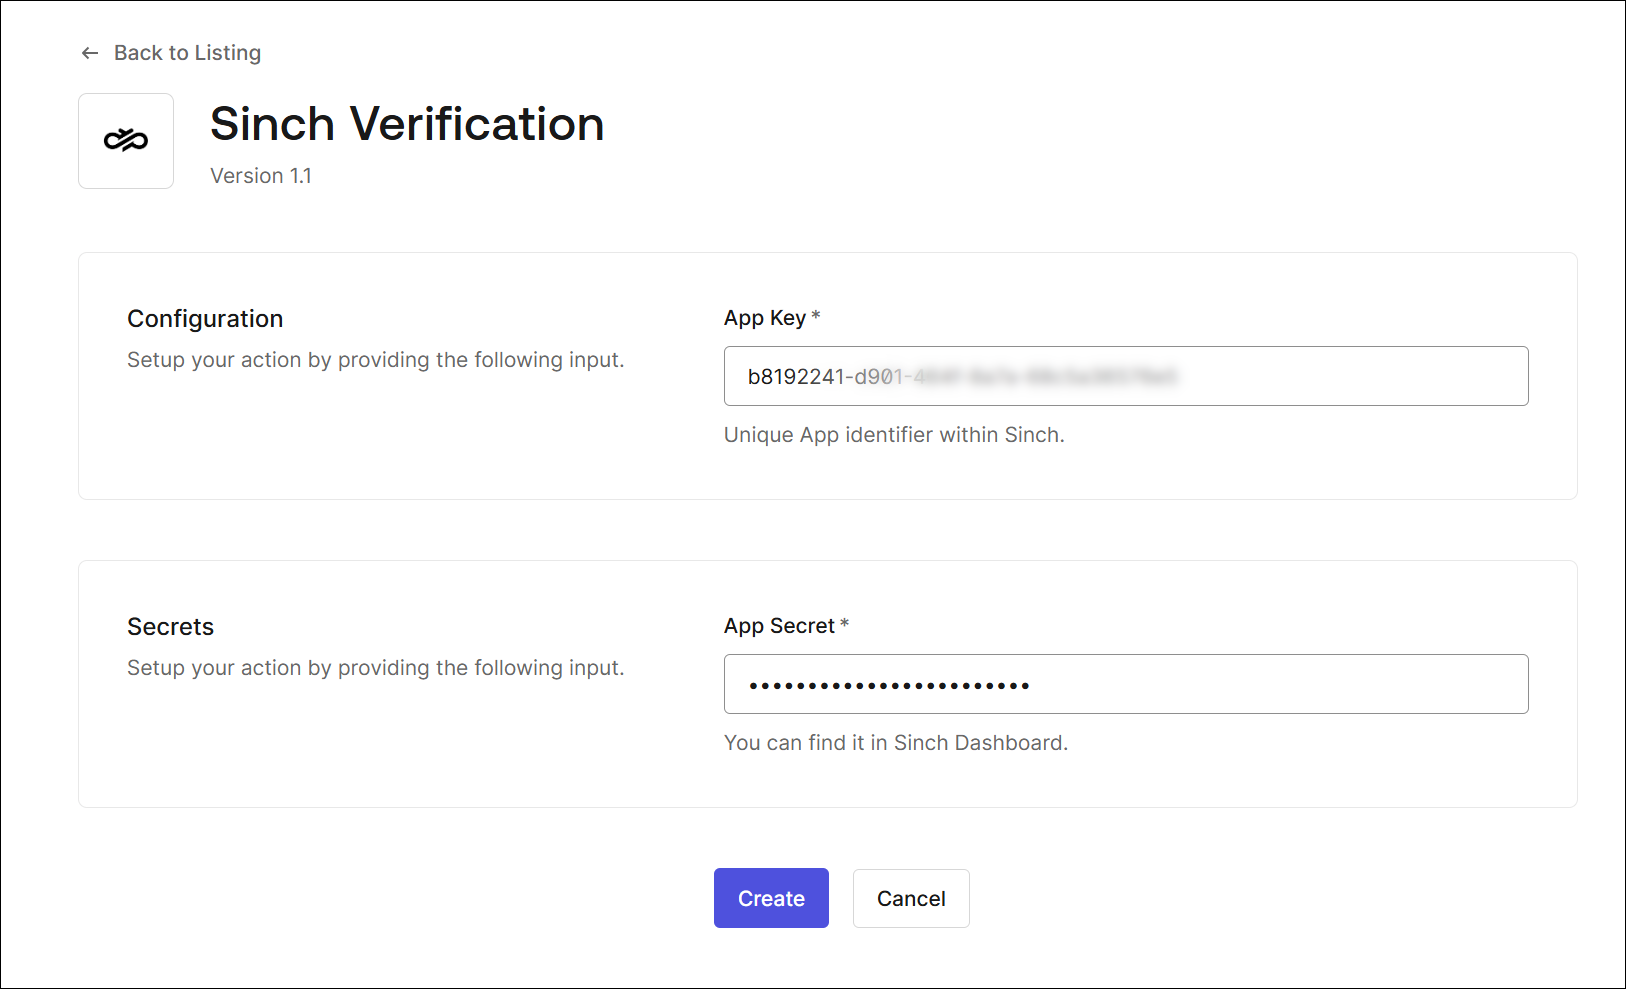
Navigate to
Actions->Triggersin the lefthand menu.Find a
post-logintrigger and drag and dropSinch Verificationfrom installed actions as shown in the picture.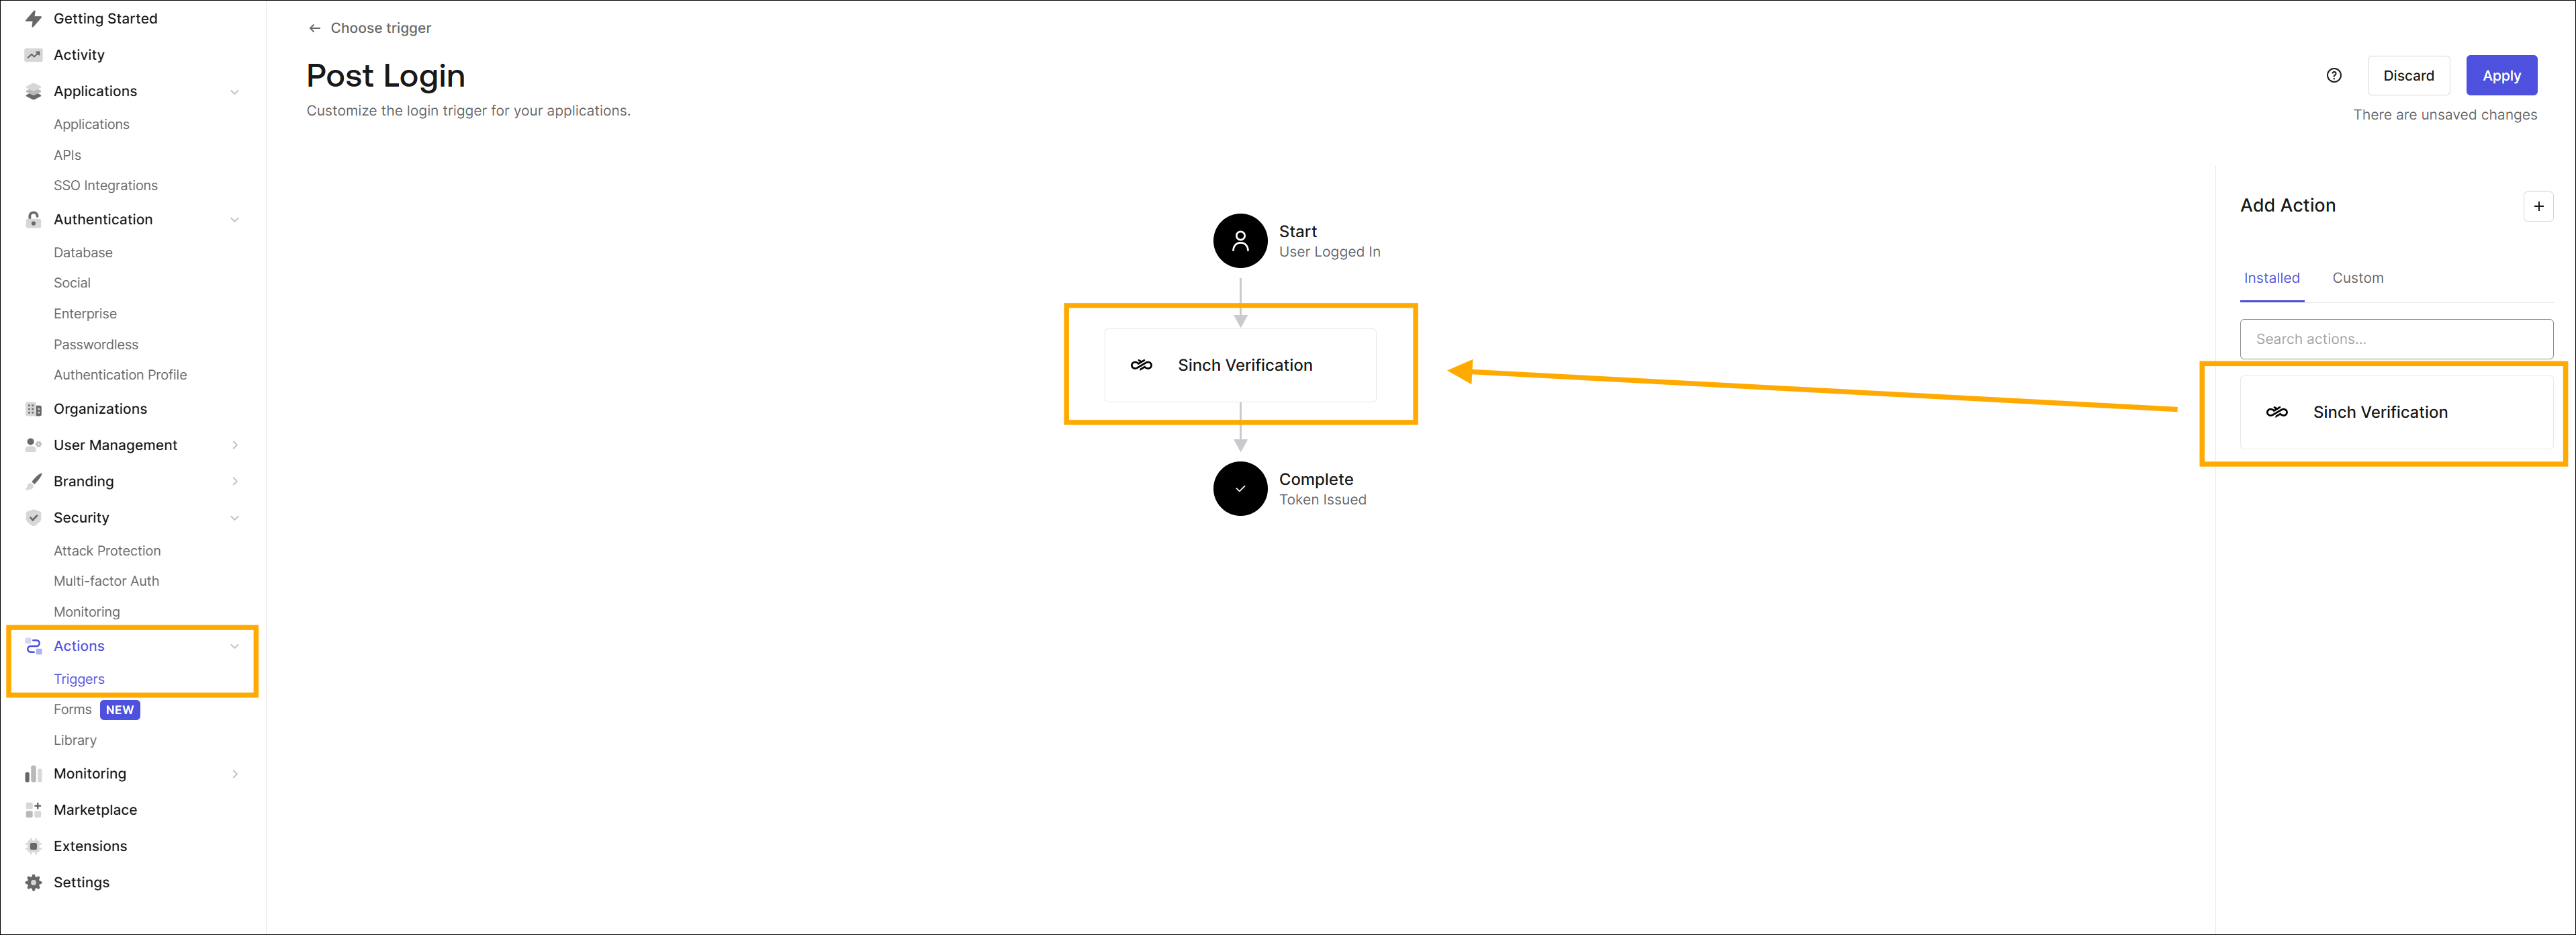
Since Sinch is a plug-in into Auth0's Multi-Factor authentication system, it requires additional setup with regards to the user's phone number collection.
The requirement is that the user's phone number is passed to user metadata under the name phone_number.
The following section is one way to achieve this, but there may be more depending on your setup.
Navigate to
Branding->Universal Loginand findAdvanced Options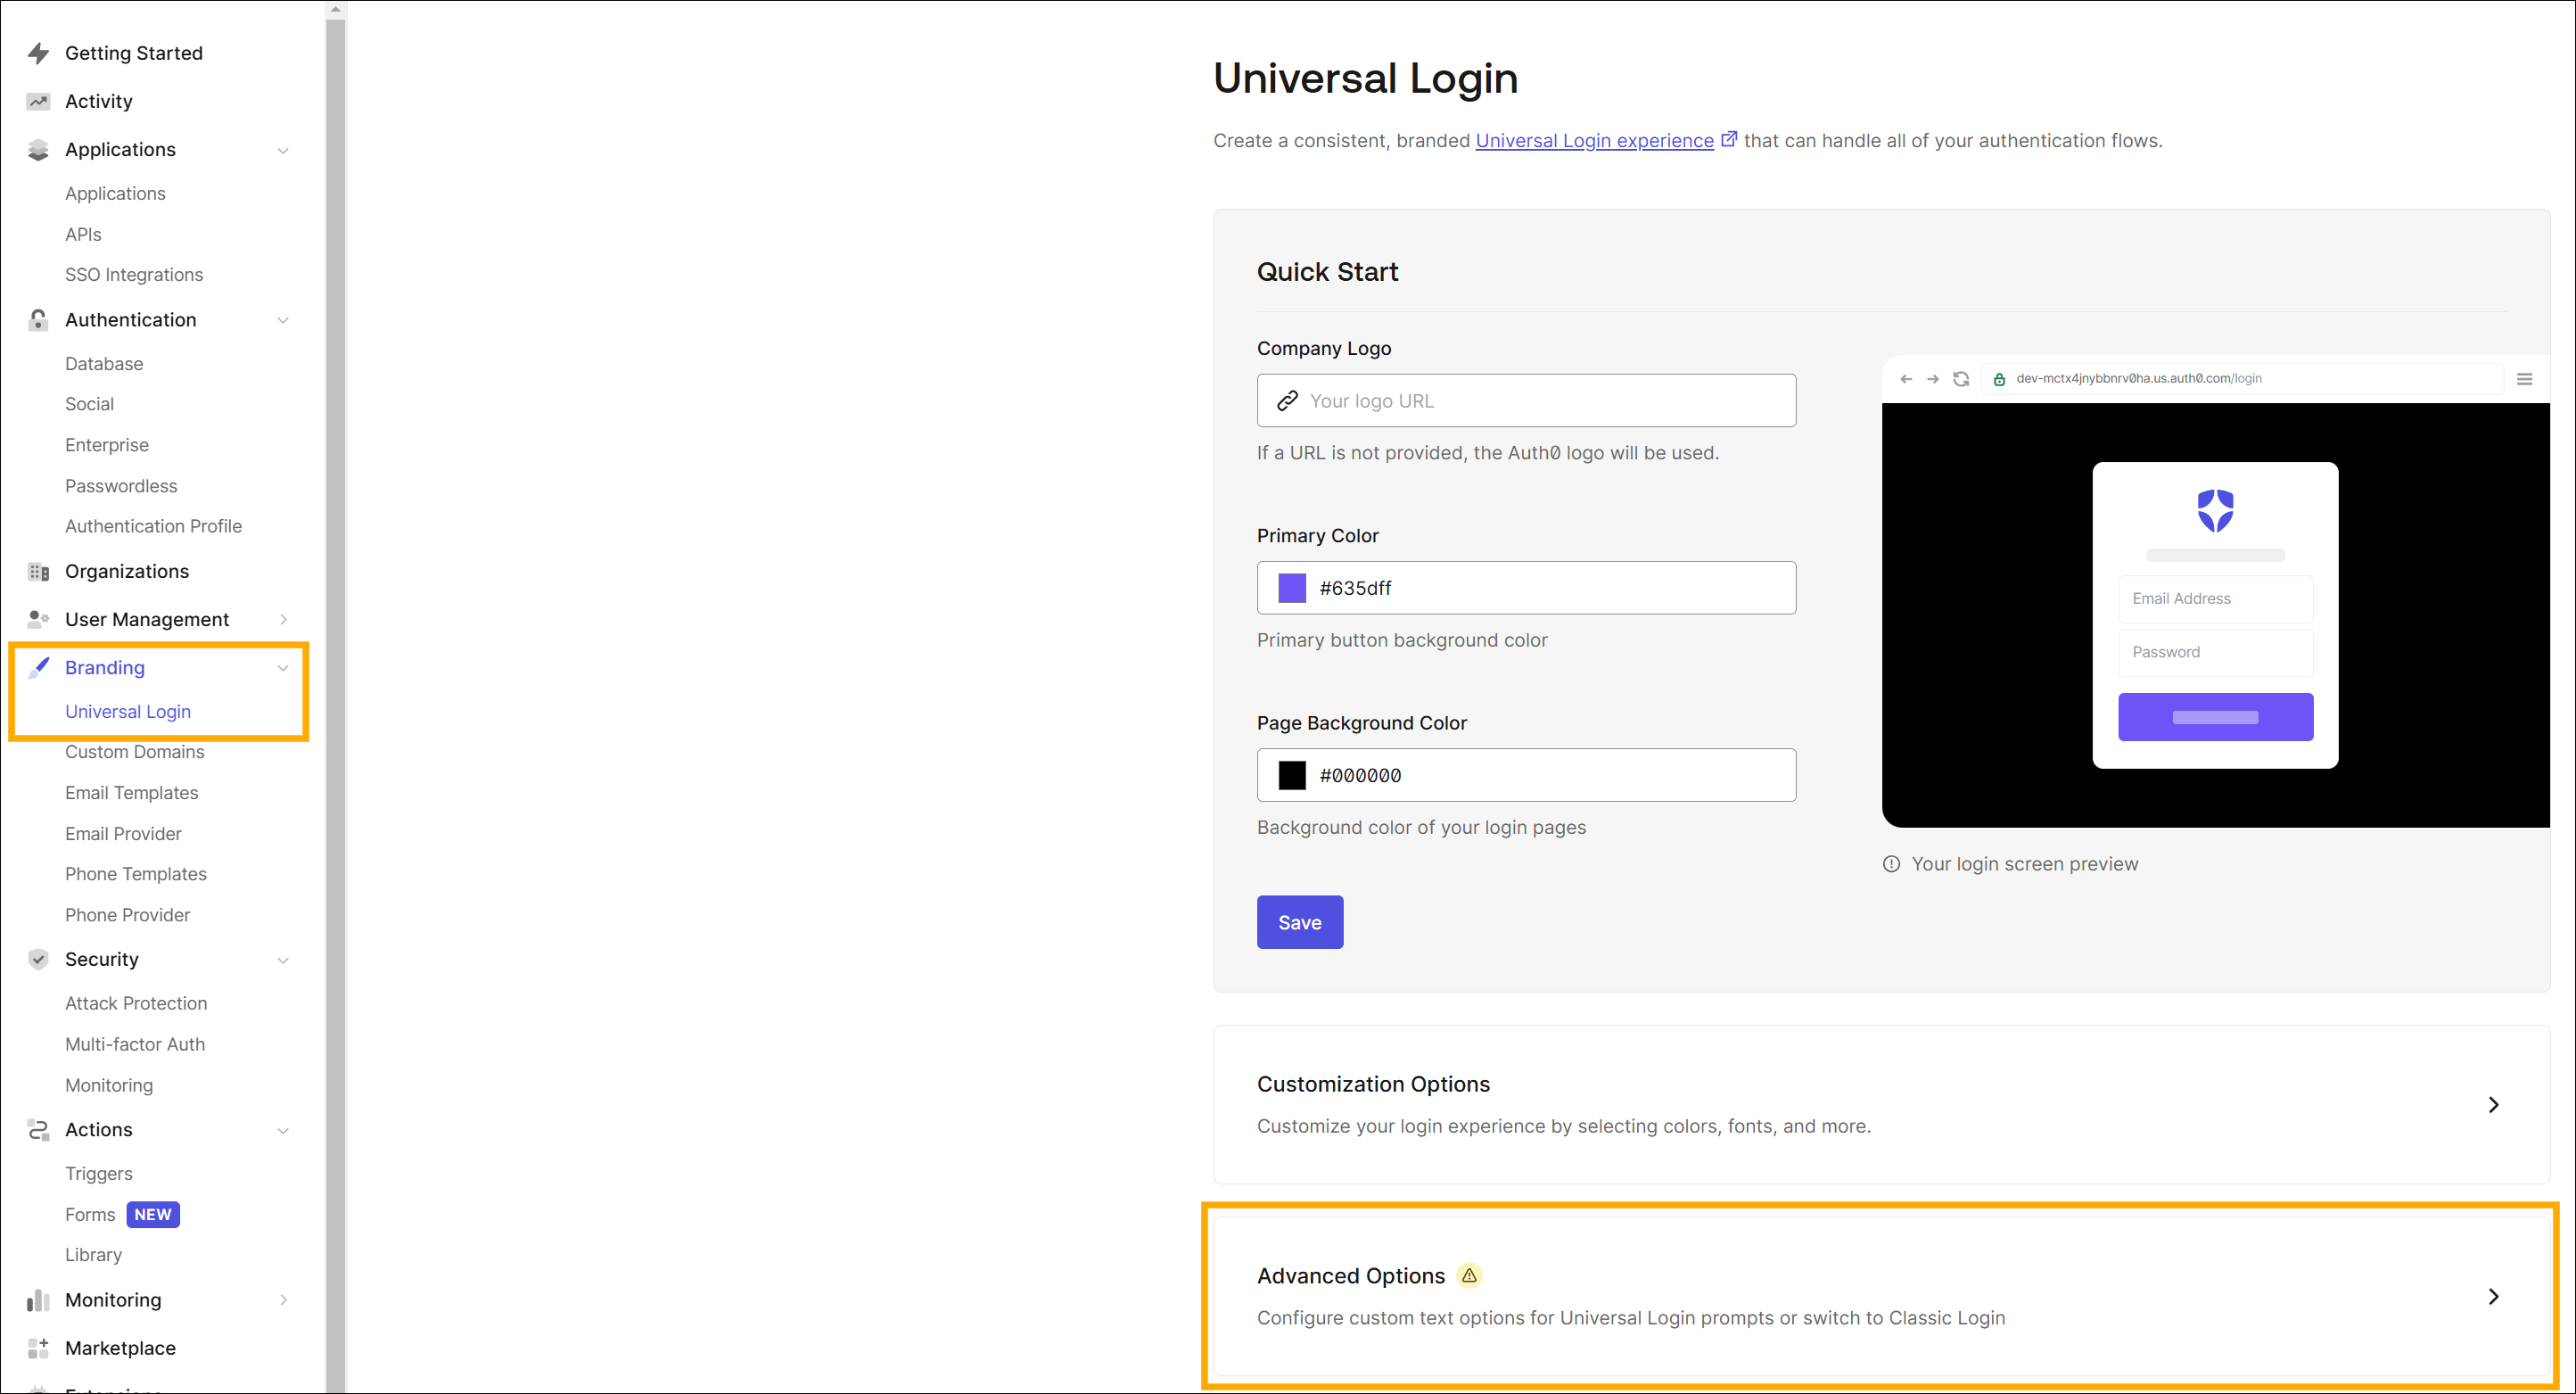
Locate
HTMLin theLogintab.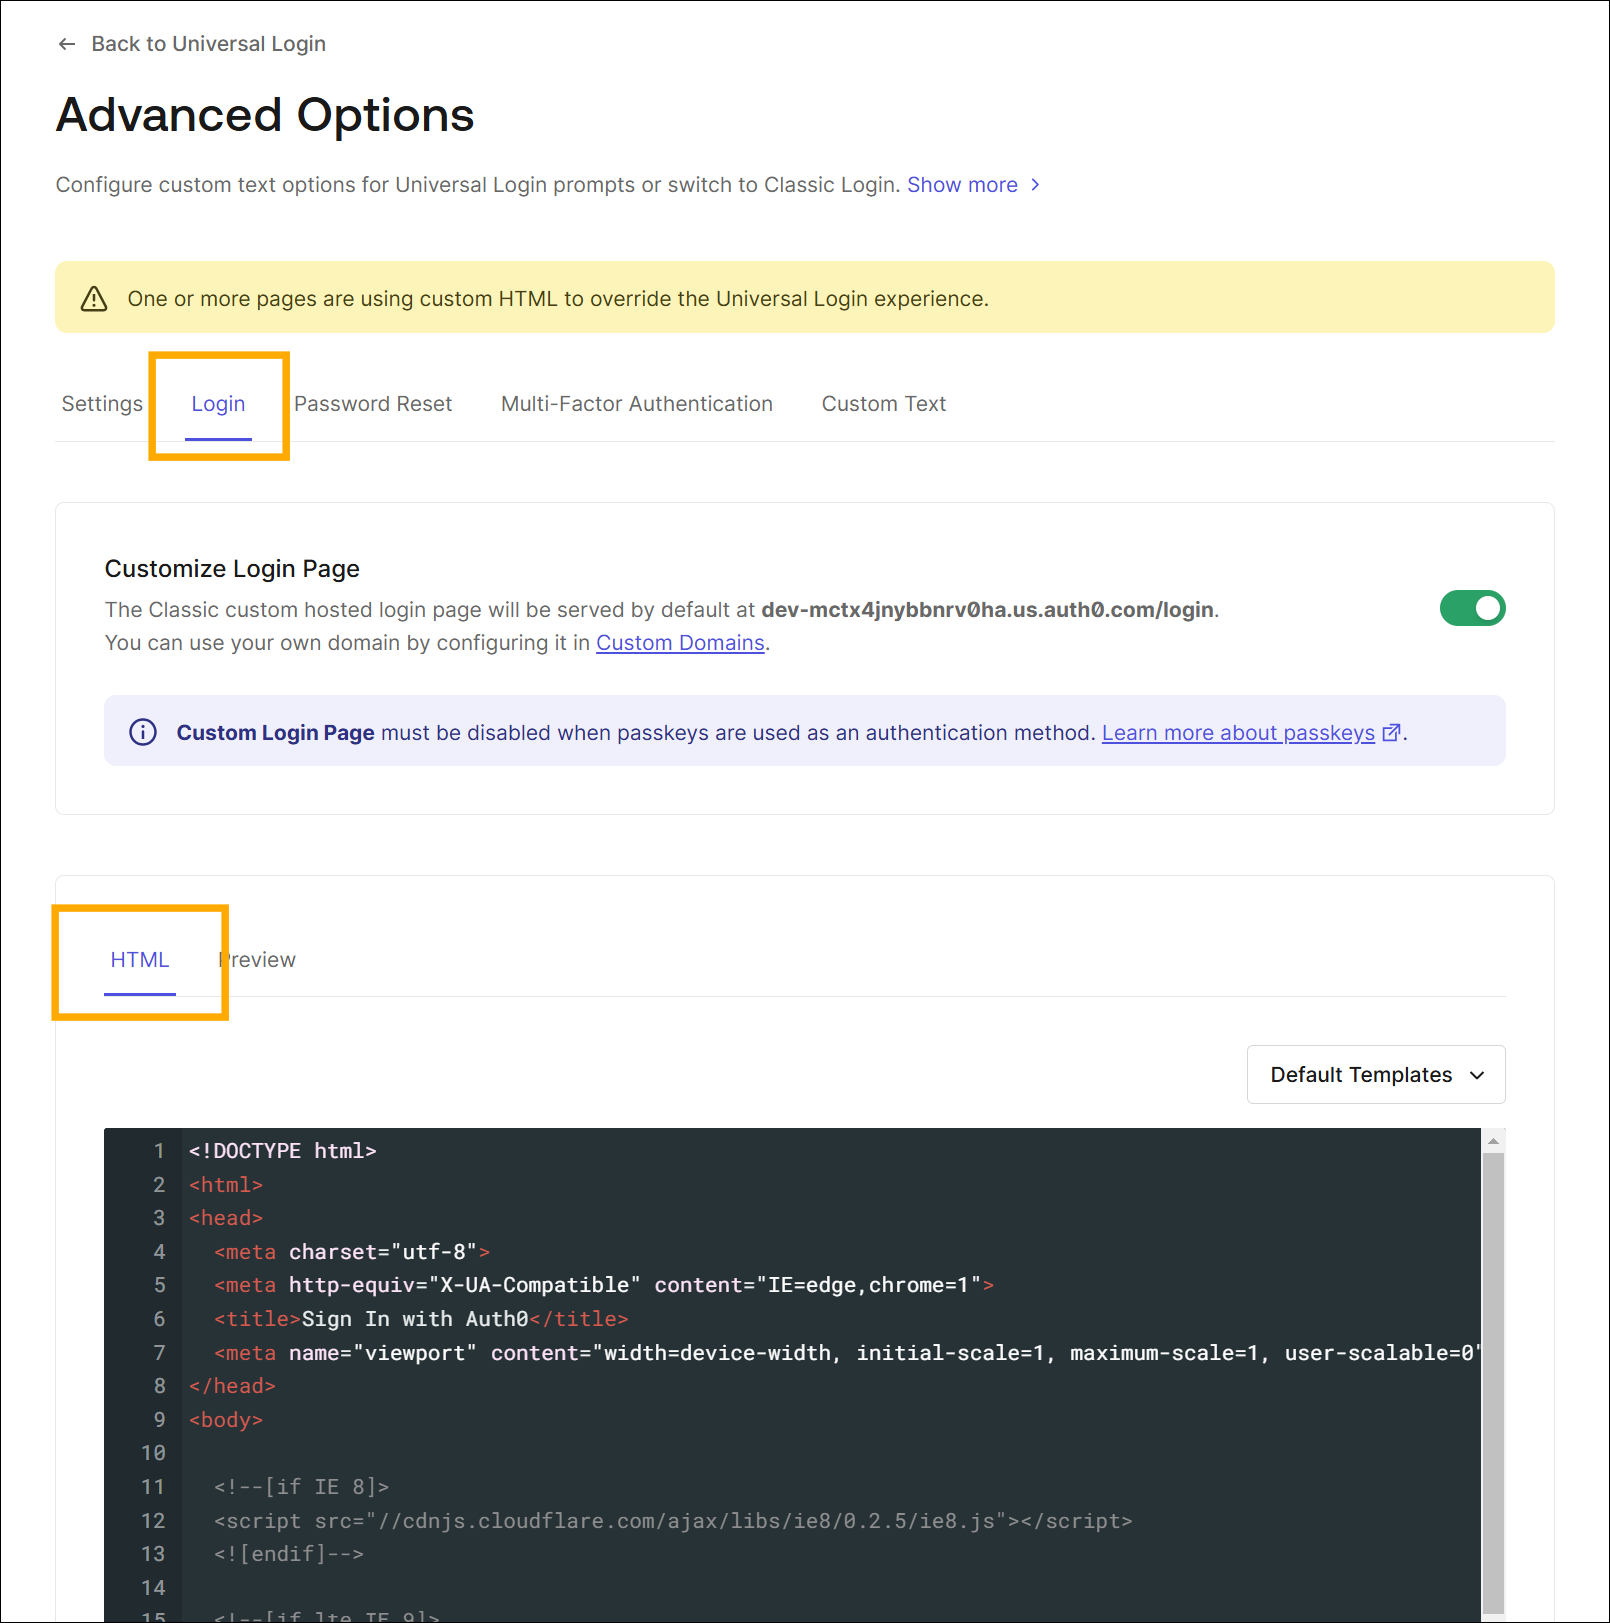
Find
Auth0Lockand addadditionalSignUpFieldswith the following data. You might want to add more, for instance,iconto customize the screen to your liking. Refer to official documentation for all available options.
var lock = new Auth0Lock(config.clientID, config.auth0Domain, {
  ...
  additionalSignUpFields: [{
    name: "phone_number",
    placeholder: "phone number",
  }]
});
Once this is done, the Sinch Verification integration is ready for use.

