Sinch Elastic SIP Trunking can easily integrate with 3CX. Follow this guide to learn how!
Before you begin setting up your Sinch Elastic SIP trunk make sure you have done the following:
- Sign up for a free account at https://www.sinch.com/ and request access for Elastic SIP Trunking. Need help? Click here for instructions.
- If you have not already done so, configure and create your Elastic SIP trunk. Instructions on how to do this can be found here.
- Ensure you note the fully qualified domain name (FQDN) that was created on your SIP Trunk. You will need this while setting up your IP-PBX or SIP Application.
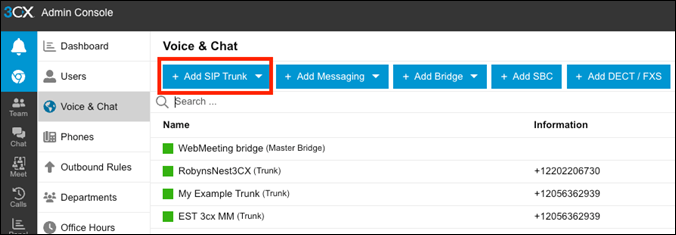
Log into your 3CX with Admin privileges and navigate to the Admin Console. Select Voice and Chat from the navigation menu. Once done, select Add SIP Trunk --> Trunk.
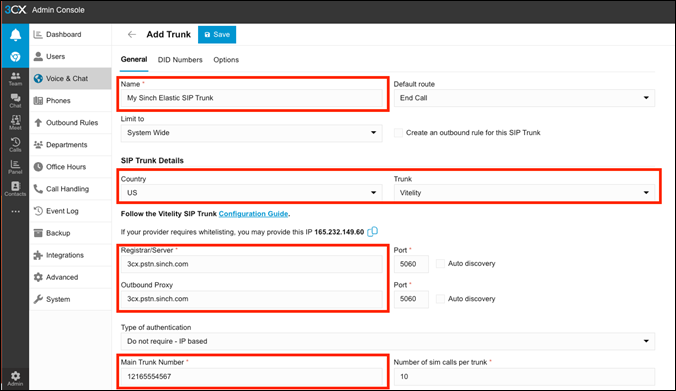
On this page, give your trunk a friendly name which can be used to easily identify it as your Sinch Elastic SIP Trunk. Then configure the following:
- Change the country to “US” and then select “Vitelity” under the Trunk setting. Ignore the option to start configuring the trunk using the Vitelity guide.
- Set the Registrar Server and the Outbound Proxy to the FQDN you created when you set up your Elastic SIP Trunk. Note: While you need to fill in the registrar to save the trunk settings, Sinch Elastic SIP Trunking does not support Trunk registration currently.
- Set a main phone number on your trunk.
Save the trunk configuration.
Note:3CX cannot accept the default wildcard certificate that Sinch uses for TLS at this time.
Now your Elastic SIP trunk should be operational and ready for traffic. Assign a number to your trunk and give it a try!

