Sinch Elastic SIP Trunking can easily integrate with the Genesys Purecloud Platform. Follow this guide to learn how!
Before you begin setting up your Sinch Elastic SIP trunk make sure you have done the following:
- Sign up for a free account at https://www.sinch.com/ and request access for Elastic SIP Trunking. Need help? Click here for instructions.
- If you have not already done so, configure and create your Elastic SIP trunk. Instructions on how to do this can be found here.
- Ensure you note the fully qualified domain name (FQDN) that was created on your SIP Trunk. You will need this while setting up your IP-PBX or SIP Application.
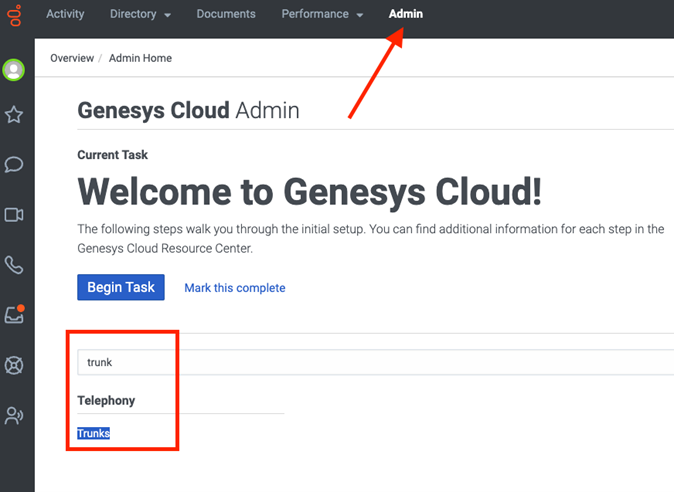
Log into your Genesys Purecloud Platform with Admin privileges and navigate to Admin and search for Trunks. Select the link that is displayed.
On the Trunks screen, click the Create New button.

Now that you are on the main SIP Trunk configuration page, ensure you configure the following:
Property name Required value External Trunk Name The friendly name for you to use when identify your trunk (for example, "Sinch-est trunk"). Number Plan Site The Number Plan Site you created for your Dialplan rules Inbound SIP Termination Identifier The domain that your system is able to accept calls on. This value will be used by the Genesys platform to create the FQDN you will use to create your SIP Endpoint in the Sinch Dashboard. Protocol UDP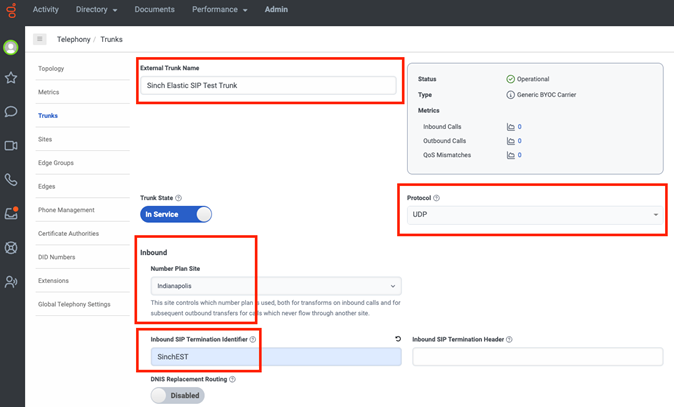
Scroll down to the next section on the same page, labeled Outbound. In the Outbound SIP Termination FQDN field, enter the full FQDN that you created when you set up your trunk in the Sinch Dashboard.
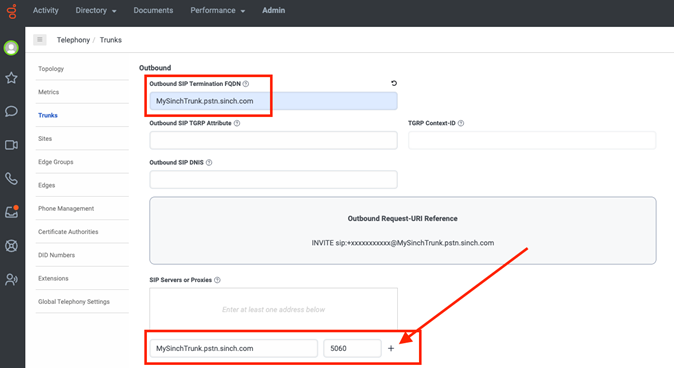
Under SIP Servers or Proxies add this FQDN again in the textbox, and enter
5060for the port. Once done, click the+(plus) symbol.In the next section, labeled Caller ID, ensure that the Caller Address is set to
E.164 number.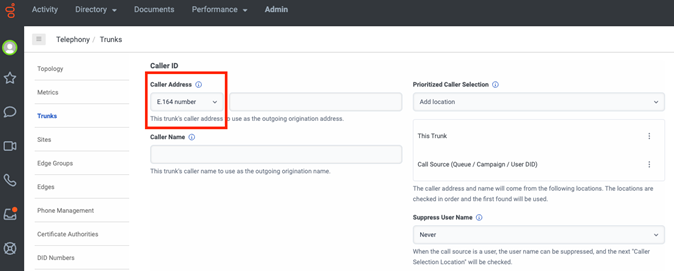
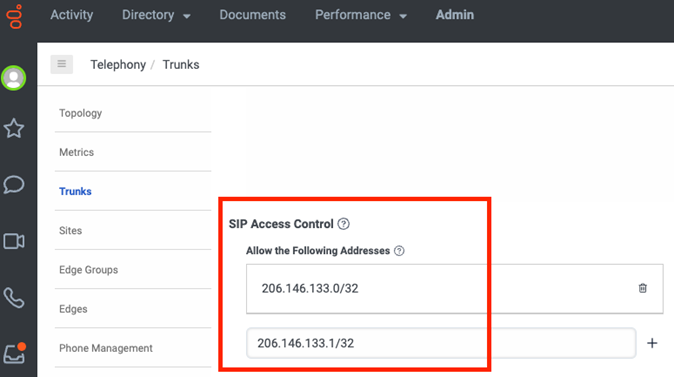
In the next section, labeled SIP Access Control, in the Allow the Following Addresses field, add the Sinch Signaling Addresses for the EST Product. You can find these in the Elastic SIP Trunking getting started guide.
Finally, expand the Media section at the bottom of the page and ensure that the Media Method option has the value of
Normal.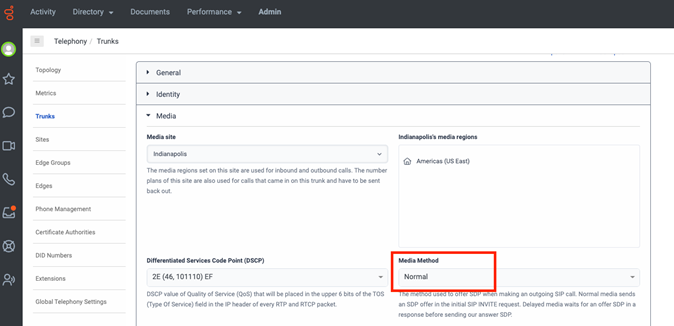
Once finished, save your configuration and now your Elastic SIP trunk should be operational and ready for traffic. Assign a number to your trunk and give it a try!