In order to send messages using the Omni Channel message activity in your journey, you must:
- Add the Omni Channel message activity to the journey itself
- Configure the Omni Channel message activity
To add the Omni Channel message activity to your Salesforce Journey:
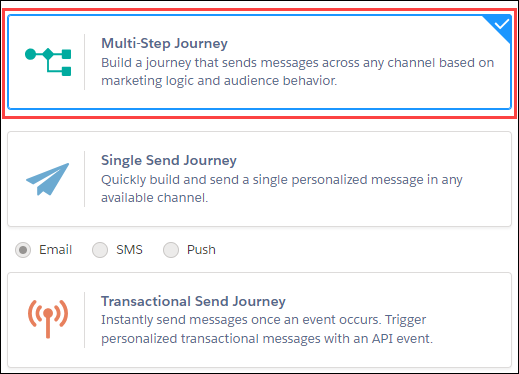
Navigate to or create the journey to which you'd like to add the Omni Channel message activity. If you are creating a journey, ensure you select a Multi-Step journey.
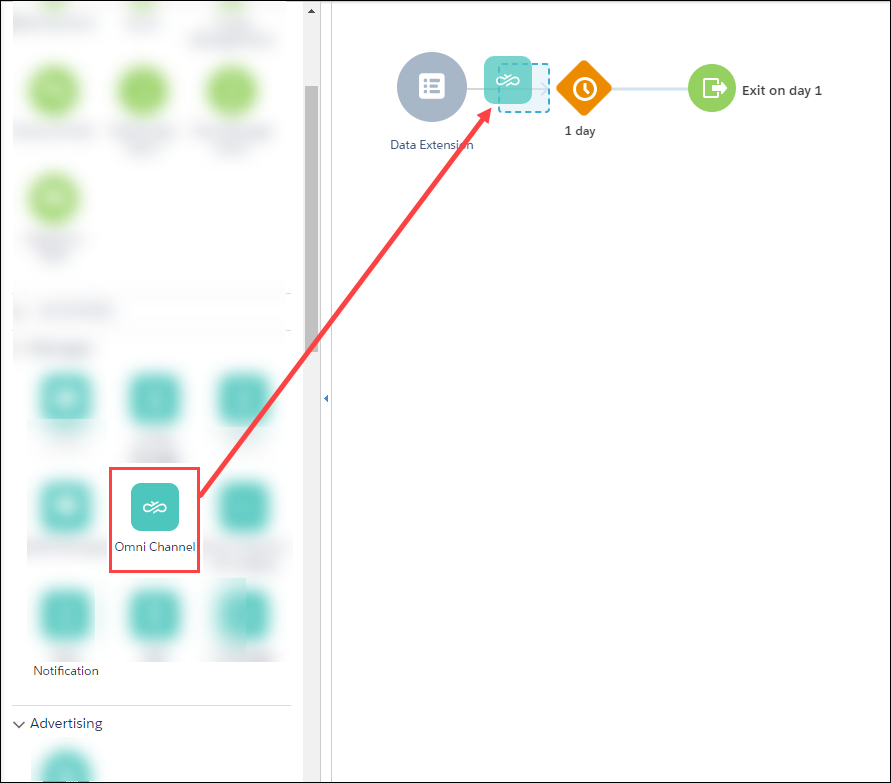
Locate the Omni Channel message activity under the Messages category of the ACTIVITIES section on the left side of the screen.

Click and drag the Omni Channel message activity to an appropriate space on your journey.
After it has been added to your journey, you must configure the Omni Channel message activity.
To configure an Omni Channel message activity that has been included in your journey:
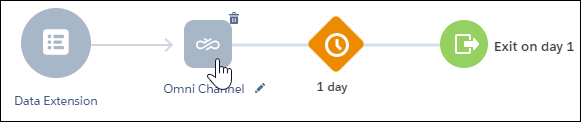
Double-click the Omni Channel message activity that is included in your journey. The first page of the Omni Channel message activity configuration wizard is displayed.
Select the Conversation API app to use with your Journey from the Conversation API App drop-down list.

Depending on your configuration (i.e., if you have an existing solution that is already set to the
CONVERSATIONprocessing mode), you may also set the processing mode. If this is a new solution, or if your existing solution uses an app that is already set toDISPATCHmode, you will be unable to update the processing mode. Note that, by default, all new Conversation API apps are set toDISPATCHmode.Finally, you may set the queue to high priority.
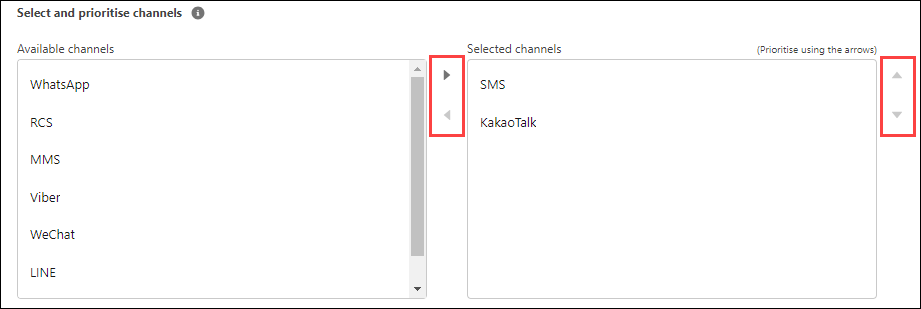
A new section, Select and prioritise channels, is displayed. Use the left and right arrow buttons to transfer channels from the Available channels list to the Selected channels list. The Selected channels are the channels the Omnichannel Connector app will use to send messages in this campaign. Use the up and down arrow buttons on the right side of the Selected channels list to determine channel priority.
When you have completed selecting and prioritising your channels, click Next in the bottom right corner of the screen. The Channel identities page is displayed.
The channel identities drop-down lists that are displayed depend on the channels you selected on the previous page. The channel identities represent the recipients of your message(s). For each displayed channel, select the source of the channel identity/recipient (for example, a phone number when using the SMS, WhatsApp, MMS, and/or RCS channels) from the drop-down list.
Note:The options available in these drop-down lists depend on the entry source that precedes the Omni Channel message activity in your journey.
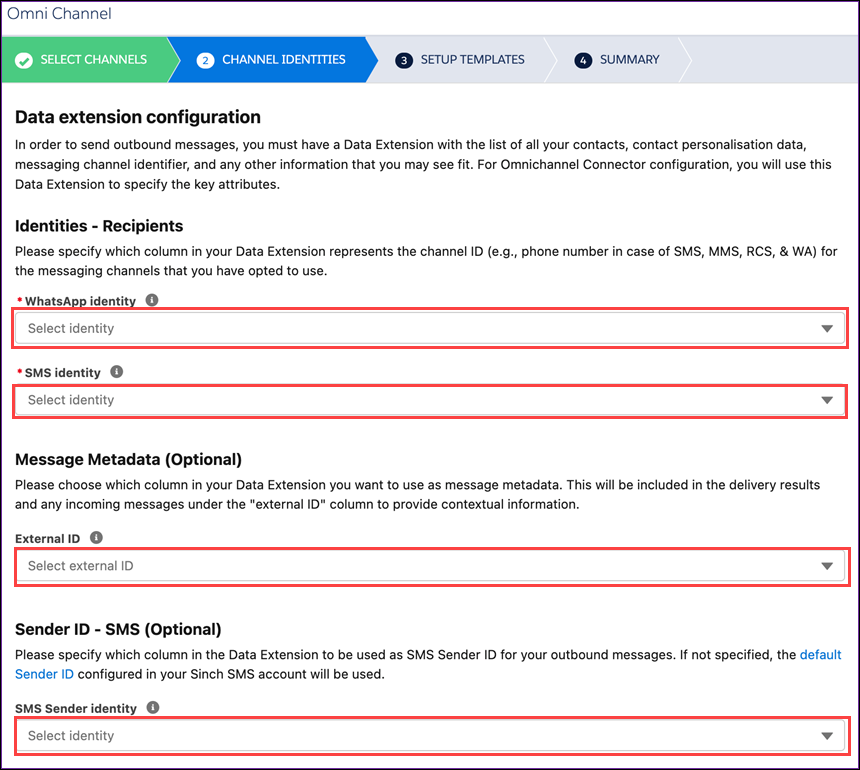
You may also specify what metadata to be included with sent messages. Additionally, you can specify an SMS Sender ID for outbound messages (the default Sender ID configured for your Sinch SMS account will be used if this value is not specified).
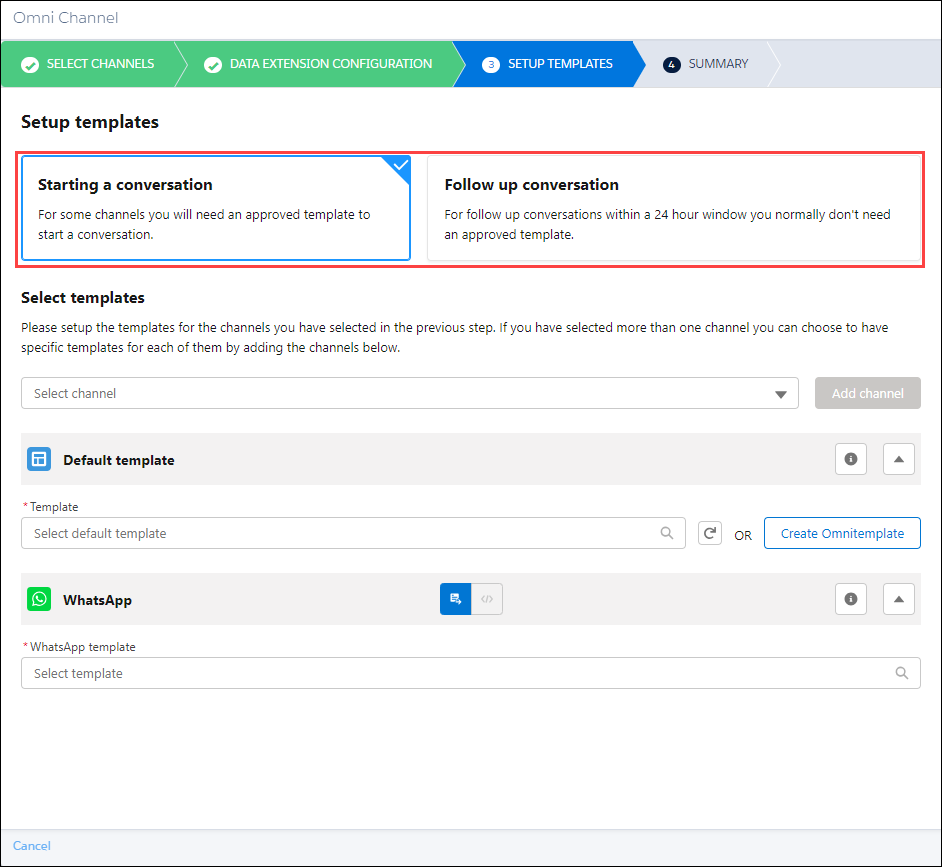
After you have completed selecting channel identities, click Next in the bottom right corner of the screen. The Setup templates page is displayed.
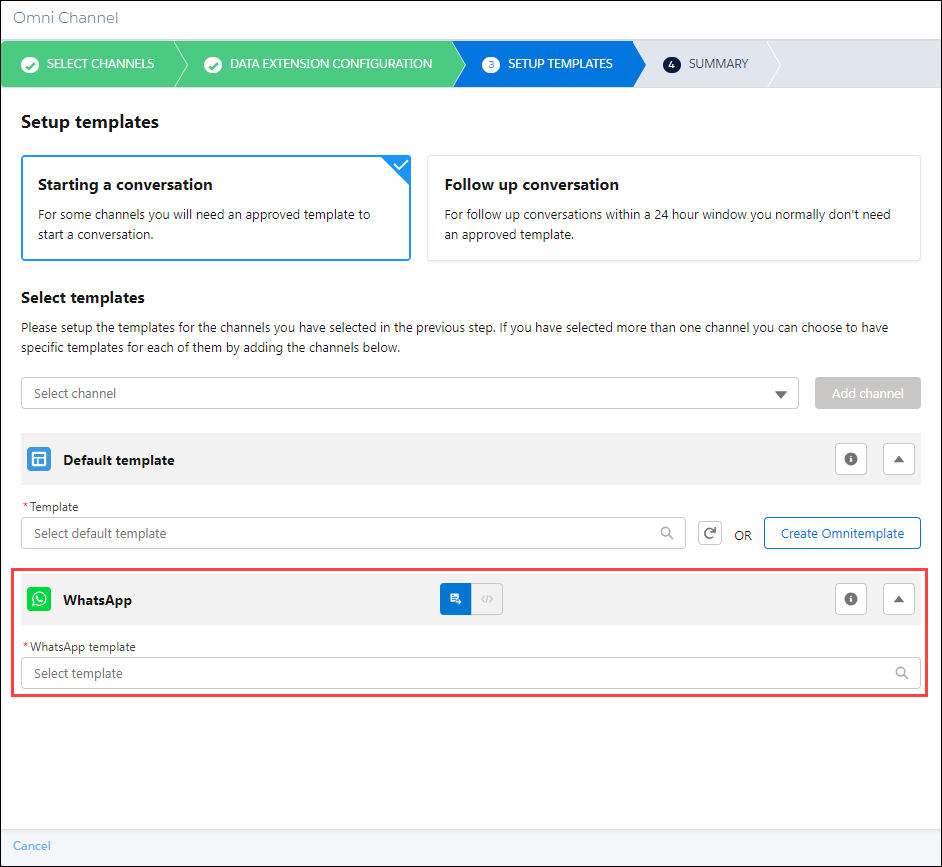
Select either Starting a conversation (if this journey is to be used to initiate conversations with recipients) or Follow up conversation (if this journey is to be used to continue a conversation). Note that some channels require an approved template to start a conversation, whereas follow up conversations allow for the use of a wider variety of templates.
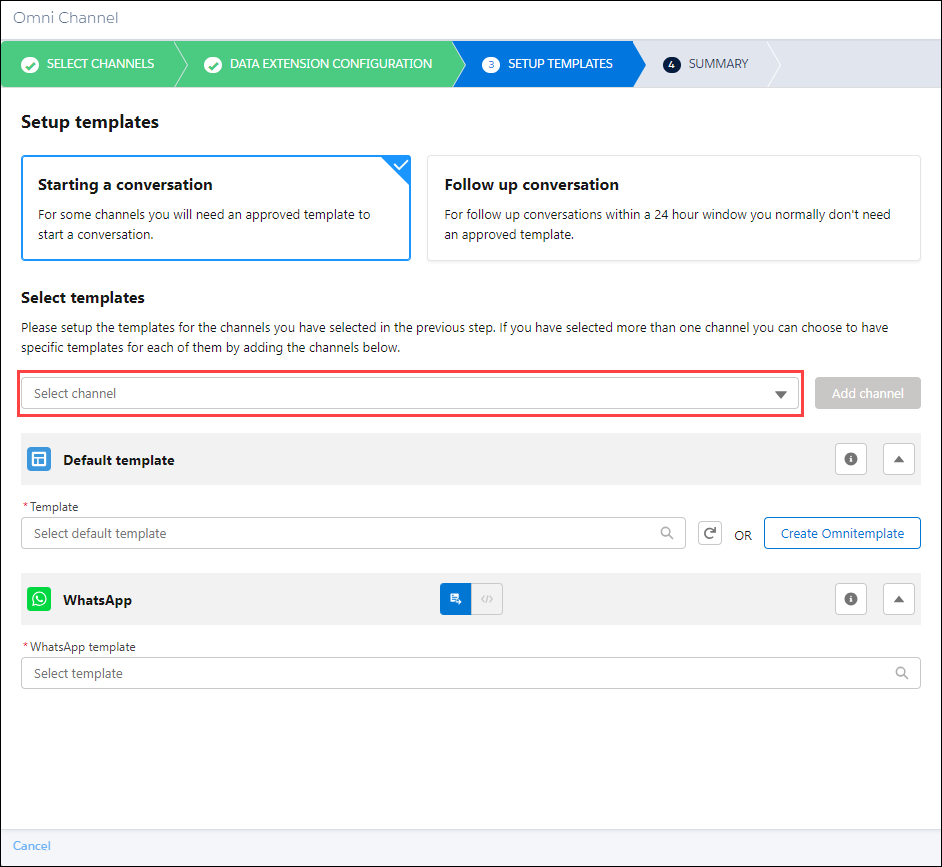
If you would like specific templates to be used with specific channels (instead of a single template for all channels), select those channels from the Select channel drop-down list and click Add channel. A section representing that channel is added to the bottom of the screen.
Note the following:
- In addition to omni-channel templates that can be used by any channel of the Conversation API, you are able to configure use channel-specific templates for certain Conversation API channels. These are templates that meet specific requirements defined by the channel itself. In many cases, these templates are used to initiate conversations. If these templates are configured in your Conversation API solution, they will appear in the drop-down list for the corresponding channel.
- In some cases, channel-specific templates may be required. If so, the corresponding channel will appear at the bottom of the screen, regardless of the channel selections you made from the Select channel drop-downlist.
Select the default omni-channel template to use when sending your message from the Select default template drop-down list, or click Create Omnitemplate to create a new template.
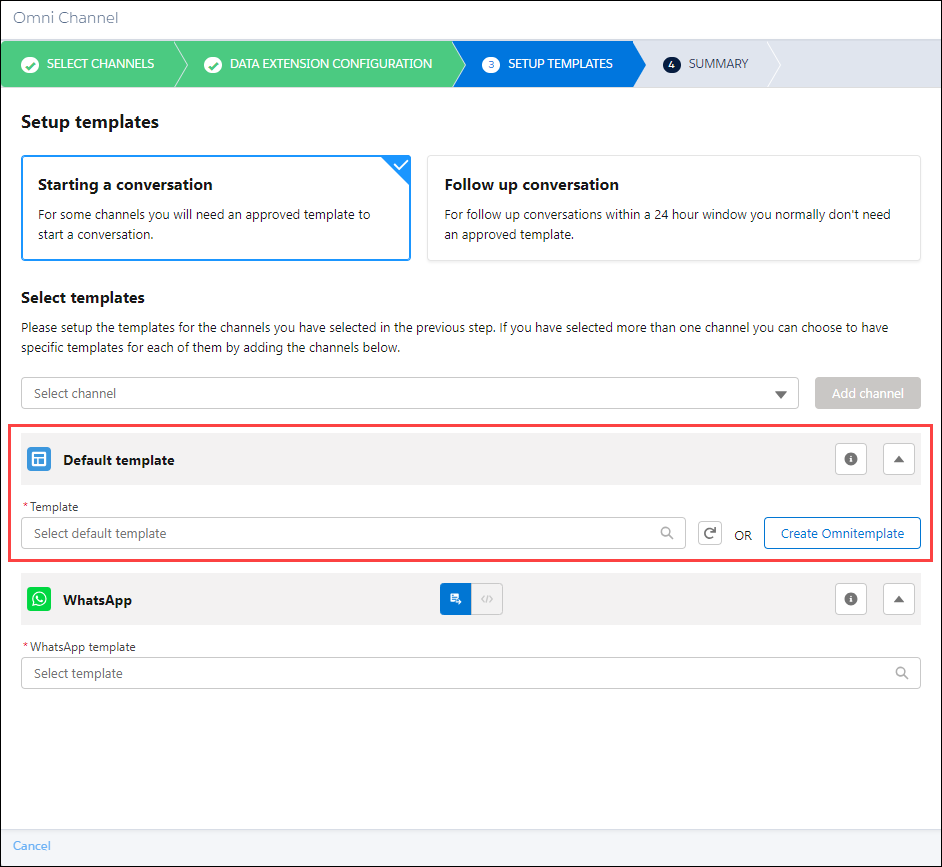
Alternatively, depending on the channels you selected earlier in the process, you may also have channel-specific templates you can choose from. These are displayed in their own sections, and may have additional options.
Note:If you selected Starting a conversation and a channel that requires an approved template in order to initiate a conversation, you must select a channel-specific template for that corresponding channel.
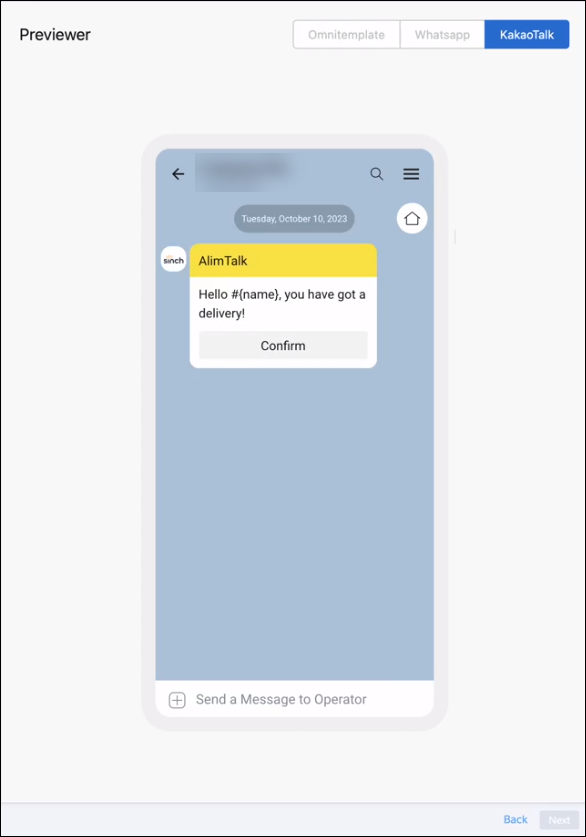
In some cases, you also define an explicit payload for the channel-specific template by clicking the coding icon and clicking Open editor.


After selecting the template, a preview of how the message will appear on the handset is displayed on the right side of the page.
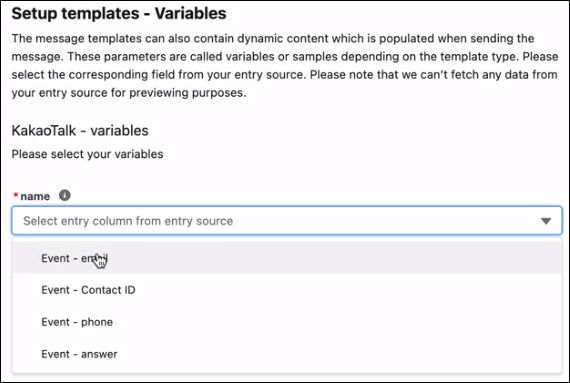
Depending on the template you choose, there may be more selections to make. Complete any remaining selections and click Continue setup. This may include configuring variables. Any variables are listed with a corresponding drop-down. For each variable drop-down, select the field from the preceding entry source that will be used to populate the variable.
 Note:
Note:If you are using an SMS channel-specific template, and you provide a value for SMS maximum parts (which corresponds to the
SMS_MAX_NUMBER_MESSAGE_PARTSproperty), you will be given an estimate of how many messages will be required when sending your content. This value is an estimate (based on the SMS maximum parts value, you encoding settings, and the lengths of the overall message content). Ensure that you monitor your outbound traffic in a production environment.After you have completed making your selections, click Next in the bottom right corner of the screen. The Summary page is displayed. First, select how you want your delivery reports and inbound messages to be stored.
- Select Save in a global bucket to store all content in a single, pre-named data extension (Omnichannel Connector Delivery Reports for delivery reports and Omnichannel Connector Inbound Messages for inbound messages from exisiting contacts).
- Select Save in a journey scoped data extension to store the content in a custom-named data extension associated with this journey. If you select this option, populate the field under the radio button with the name to use for the data extension.
- Note that inbound messages from unknown contacts will be saved in the Omnichannel Connector User-Initiated Messages Data Extension regardless of your selection.
- After making your selections, click Confirm Data Extensions.
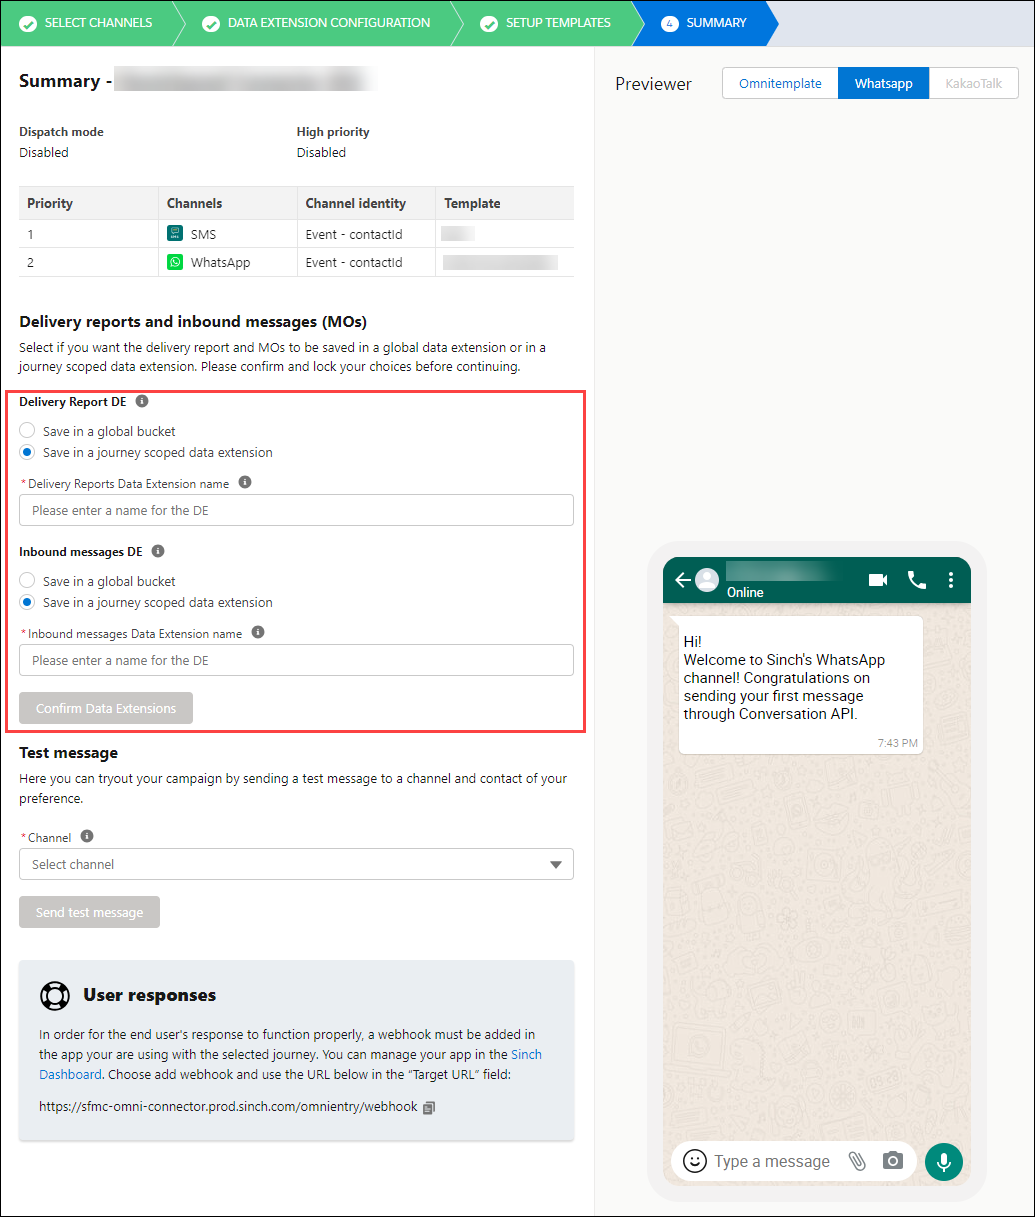
Then, review the rest of your your configuration options. You may optionally send a Test message by selecting the appropriate channel, populating required fields, and clicking Send. This will emulate the Omni Channel message activity's functionality, though the information you provide will be populated by the entry preceding the Omni Channel message activity in your journey in production.

Once you have reviewed your configuration (and, optionally, sent a test message and validated that the test message was received), click Done in the bottom right of the screen. If there are any issues with your test message, or if you need to update your configuration, use the Back button to navigate through the configuration process and update your selections.
After messages are sent on the Conversation API, delivery reports are generated. Data from these delivery reports is transferred to your connected Omnichannel Connector app and stored in a Data Extension called Omni Connector Delivery Reports. This Data Extension includes the following fields (any corresponding Conversation API delivery report fields are noted in the table):
| Data Extension field | Conversation API field | Description |
|---|---|---|
eventId | N/A | The ID of the journey event associated with this Data Extension |
eventTime | N/A | The time at which the journey event occurred. |
messageId | message_id | The ID of the sent message. |
contactId | contact_id | The ID of the contact to whom the message was sent. Will be empty if the processing_mode of the corresponding Conversation API app is set to DISPATCH. |
identity | channel_identity | The identity of the contact in the underlying channel (for example, a phone number for the SMS channel or WhatsApp channel). See the identity field of the Channel Identity object for details. |
channel | channel | The channel on which the message was sent. See the channel field of the Channel Identity object for details. |
status | status | The delivery status of the message. See Delivery Status for details. |
errorCode (if present) | The code field of the reason object | High level classification of the error. See Error Codes for details. |
errorMessage (if present) | The description field of the reason object | A description of the error. See Reason for more information. |
journeyId | N/A | The ID of the corresponding journey. |
journeyName | N/A | The name of the corresponding journey. |
journeyVersion | N/A | The version of the corresponding journey. |
activityId | N/A | The ID of the activity that supplied the data to this Data Extension. |
activityName | N/A | The name of the activity that supplied the data to this Data Extension. |
templateChannelType | N/A | Either Omnichannel or a channel-specific template. |
templateId | N/A | The ID of the template used to send the message. |
templateName | N/A | The name of the template used to send the message. |
omnichannelMessageId | N/A | An internal identification value that is used by backend processes. |
externalId | N/A | An external identifier |
You may export this data to process it externally. You may also use the Omni Flow flow control to configure your journey to respond to the status of the delivery report.

